The Ultimate Origami Unicorn Guide: Materials, Folds, and Pro Troubleshooting
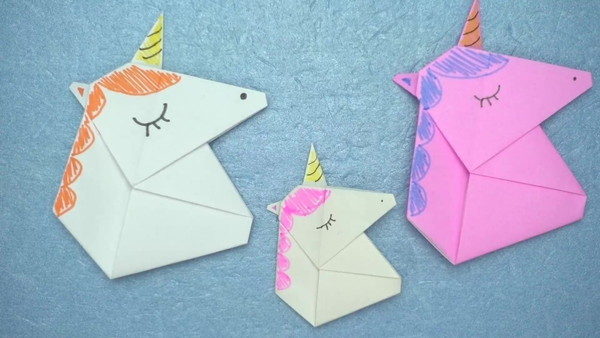
Every paper folder eventually faces the mythical beast. While a traditional crane asks for sixteen steps and forgives minor misalignments, an origami unicorn demands unflinching structural precision. One millimeter of drift at step seven compounds into a blunt, torn horn by step thirty-eight. Across design studios and maker communities in 2026, folding this creature has become a quiet rite of passage for folders transitioning from beginner models to complex representational origami.
The difficulty lies in flap distribution. A horse requires four distinct limbs, a neck, a head, and a tail, exhausting the four corners of a standard square sheet. Adding a spiral horn forces the folder to generate an extra corner from the center of the paper or drastically alter the geometry of an existing flap. Without the right sequence and material, the model buckles under its own internal tension.
📌 Key Takeaways:
- The Structural Core: Most successful models rely on an extended bird base variation, pulling hidden paper layers outward to yield an extra flap specifically for the horn.
- The Decisive Variable: Standard 70 GSM copy paper is too thick; foil-backed paper or 40, 50 GSM treated tissue yields razor-sharp horn spirals without tearing.
- The Balance Factor: Achieving a self-standing 3D model requires precise reverse-fold lock points inside the chest cavity to prevent the front legs from splaying outward.
The Geometry Behind the Myth: Why Unicorns Break Standard Bases
Traditional origami relies on standard platforms: the preliminary base, the waterbomb base, the frog base, and the bird base. A classic bird base produces four large flaps and two smaller central points. Folders use those four flaps for legs, head, and tail. But a unicorn breaks this classical economy. It demands seven long points: four hooves, one head, one tail, and one sharp horn.
Pioneering designers like John Montroll solved this mathematical riddle by introducing asymmetrical sink folds, while modern masters like Satoshi Kamiya manipulate the underlying crease pattern through circle packing. When you fold a unicorn, you are not simply bending paper. You are redistributing surface area so that paper originally tucked inside the chest migrates to the brow of the skull.
If you attempt this fold on standard 80 GSM wood-pulp paper, layers stack rapidly. By the time you shape the forehead, twelve layers of paper sit squeezed into a two-millimeter space. The outer fibers stretch until they snap, turning what should be a slender horn into an unraveling nub. Precision folding requires understanding how those internal layers interact before your hands ever touch the sheet.
Paper Selection: The Metric That Decides Failure or Success
Beginning folders almost universally blame their hands when a complex model collapses. The fault almost always belongs to paper selection. A standard 15-centimeter square of student origami paper (kami) carries a chemical coating that cracks when subjected to multi-layered reverse folds. To finish an intermediate origami diagram cleanly, folders must match the paper weight to the model's layer density.
Foil-backed paper, often referred to as sandwich paper or tissue foil, remains the gold standard for folding mythical equines. The ultra-thin aluminum core holds sharp creases without springing back, while the tissue exterior absorbs light naturally. Folders working on display pieces often turn to Japanese Tant or Korean Hanji, but these papers require chemical sizing or wet-shaping to hold compound curves.
| Paper Type | Typical Weight | Horn Definition | Standing Rigidity |
|---|---|---|---|
| Standard Kami | 60, 70 GSM | Poor; cracks along multi-layer edges | Moderate; splays over 48 hours |
| Single/Double Tissue Foil | 35, 50 GSM | Exceptional; holds micro-crimping | High; internal foil locks legs |
| Tant Paper | 75, 80 GSM | Challenging; requires wet-creasing | Exceptional; rigid fiber structure |
| Elephant Hide (Elefantenhaut) | 110 GSM | Impossible at standard scale (15cm) | Archival strength for 40cm+ sheets |
For an intermediate model measuring 15 to 20 centimeters, choose a sheet weighing under 50 GSM. If purchasing commercial origami paper, verify that the package specifically lists "thin" or "tissue foil." Working with standard printer paper (typically 75, 90 GSM) almost guarantees failure during the final head collapse.
Step-by-Step Architecture: From Base to Four Legs
Every origami unicorn step by step sequence begins with ruthless symmetry. Lay the sheet color-side down on a clean, hard surface. Avoid folding in your hands; table-top creasing produces crisp reference lines that prevent asymmetric torque later.
Start with a waterbomb or square preliminary base, depending on the specific model variation. Flatten the corners into petal folds to construct a classic bird base. Here comes the divergence: rather than leaving the bottom flaps untouched as you would with a crane, perform a series of squash folds along the interior pleats. This pulls trapped interior paper to the exterior perimeter.
Use the inside reverse fold technique on the lower extremities to divide the thick bottom flap into two distinct narrow strips. These will become the front and hind legs. At this stage, check your center crease. If the centerline deviates by even half a millimeter, the chest cavity will pull diagonally, preventing the model from resting evenly on all four hooves.
Narrow each leg using valley folds that tuck paper into the center seam. Folders often make the mistake of pressing the legs completely flat against the body here. Keep the paper pliable. The legs must retain an internal hollow arch to support 3D standing origami later in the sequence.

The Crucible of the Horn: Precision Shaping and Mane Detailing
The neck and head sequence separates skilled folders from frustrated novices. The head flap is typically created through an outside reverse fold that swings upward from the shoulders. Within this single neck flap, your previous squash folds have embedded an extra sliver of paper.
Isolate this slender interior triangular flap. Gently separate it from the head layers using a blunt tooth-pick or a curved bone folder. This is the raw horn. To achieve realistic origami horn shaping, avoid folding it flat against the skull.
Execute an accordion crimp or micro-twist along the horn flap. Pinch the base of the horn tightly against the brow bone to form an anchor, then roll the paper along its vertical axis between your thumb and forefinger. This rolling action converts a 2D triangular sliver into a tight, spiral, conical spike.
Directly behind the horn, pleat the remaining dorsal neck layers to form the mane. Three tiny outside crimps along the crest of the neck suggest flowing hair while structurally tightening the neck, preventing the head from drooping forward under its own layer weight.
Wet-Folding and Sizing: Transforming Flat Paper into Living Sculpture
Akira Yoshizawa pioneered the wet-folding technique in the mid-twentieth century, fundamentally changing representational paper art. By introducing controlled moisture to water-soluble sizing (such as methylcellulose) inside the paper, folders can sculpt soft curves that dry with rock-like permanence.
Do not spray water directly onto an intermediate model; the fiber bond will disintegrate. Instead, dampen a clean microfiber cloth or makeup sponge until barely moist. Lightly press the cloth against your fingertips, then handle the horse's flank, chest, and hocks. The faint moisture softens the sizing just enough to let you shape a convex ribcage and slightly bent knees.
Hold the legs in a dynamic, balanced stance using miniature alligator clips cushioned with small scraps of cardstock to prevent teeth marks. Let the model cure for three to four hours in a dry room. Once the cellulose dries, the unicorn transitions from a geometric shell into a self-supporting, organic figure that stands securely on four hooves without external wire armatures.
Troubleshooting the Most Common Intermediate Breakdowns
Even seasoned folders encounter recurring physical failures when folding equines. These issues stem from mechanical paper stress rather than missed diagram instructions.
When the horn tears during the spiral twist, paper creeping is the underlying cause. As multiple folds nest inside each other, the internal layers push the outer paper outward, stretching fibers beyond their tensile threshold. To fix this, open the neck fold slightly and trim away fraction-of-a-millimeter margins from the hidden inner layers before rolling the horn.
If the finished unicorn refuses to stand and repeatedly collapses onto its side, the front legs are carrying unequal weight. Examine the hooves from underneath. If one foot sits rotated inward, adjust the crimp inside the shoulder joint. A minute rotation of the internal reverse fold inside the chest alters the contact angle of the hoof by several millimeters, stabilizing the center of gravity directly over the midpoint of the torso.
Frequently Asked Questions (FAQ)
Q1: What sheet size is ideal for an intermediate origami unicorn?
A1: Beginners to this specific model should use a 24 × 24 cm (9.5-inch) square. While experienced artists can fold unicorns from 15 cm sheets, the micro-layers inside the horn become extremely difficult to maneuver at that scale without specialty tweezers.
Q2: Why does the neck of my unicorn keep unfolding or springing open?
A2: This happens when the paper lacks sizing or has an elastic fiber memory, common in thick kraft paper. Lock the neck by crimping the bottom layers inside the chest cavity with a mountain fold, or apply a drop of methylcellulose adhesive to set the crease permanently.
Q3: Can I fold an origami unicorn from regular two-color origami paper?
A3: Yes, standard duo-colored paper works, but ensure the white side faces the intended parts of the model. In most diagrams, starting white-side up results in a colored body with a contrasting horn and mane, though high-stress corners may reveal white stress tears if folded too aggressively.
The Architecture of Patience in Modern Paper Arts
Folding complex mythological creatures proves that origami is as much an exercise in material science as it is an artistic discipline. The unicorn tests a folder's respect for paper limits, structural balance, and geometric economy. Rushing through the foundational base inevitably leads to a mangled horn at the finish line.
Take the time to evaluate your stock, sharpen your reference creases, and manage internal layer tension. When you complete that final reverse fold and release the clips from the legs, you are not simply looking at folded paper. You are looking at a self-supporting testament to balance, geometry, and human patience.
