Visual Guide to Flawless Mini Fruit Tarts: Step-by-Step Styling for Showstopping Desserts
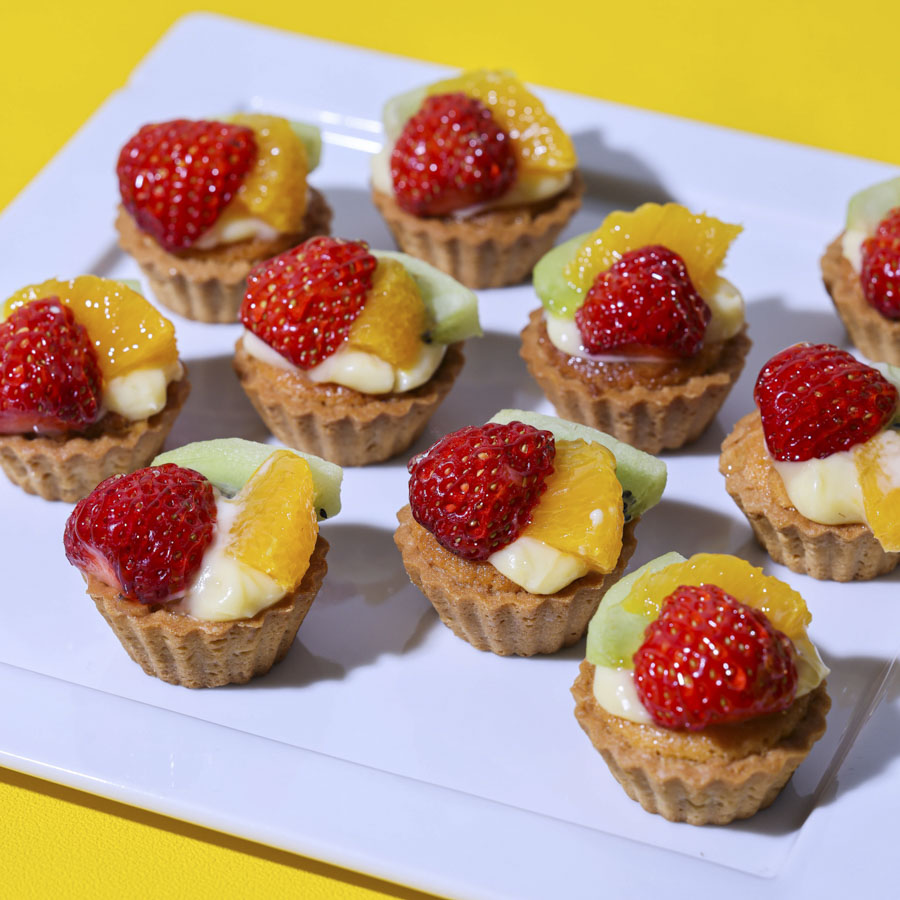
Few desserts command a dessert display quite like a French-style individual tartlet. In culinary circles across Tokyo, Paris, and New York, demand has surged for precise, single-portion pastries that balance structural crunch with silky pastry cream and sharp seasonal acidity. A recent MSN Report covering boutique strawberry tart preparations highlights how seasonal fruit pairings continue to dominate home baking trends, as pastry cooks swap dense sheet cakes for bright, bite-sized party dessert presentations.
Yet producing bakery-quality tartlets at home often trips up ambitious bakers. A crust turns limp within an hour, the custard weeps liquid under fresh berries, or the fruit turns dull on the plate. Eliminating these failures requires understanding the precise pastry science that protects shell crispness, stabilizes pastry cream, and locks in visual clarity.
📌 Key Takeaways:
- Crust Architecture: A classic French pâte sablée tart shell must be blind-baked to 175°C (350°F) until fully dry to provide long-lasting structural support.
- Moisture Mitigation: Preventing soggy tart crust demands either an egg-wash seal or a thin layer of cocoa butter before piping in the filling.
- Finish and Stability: An apricot nappage glaze warmed to 40°C seals seasonal berries against oxidation while imparting professional glass-like sheen.
Engineering the Crisp Foundation: Pâte Sablée and Blind Baking Tips
Professional pastry chefs bypass standard pie crust entirely when building miniature tarts. Flaky pie dough contains visible pockets of butter that melt to create air pockets, a texture poorly suited to supporting wet custard. The gold standard is a classic pâte sablée tart shell, a sweet, sandy French shortcrust dough mixed via the creaming method or rubbed-butter method.
Using powdered confectioners' sugar rather than granulated sugar reduces moisture retention and prevents gluten development. Chilling the dough twice, first after rolling it out to 2.5 mm thickness, and again after lining each mini tart pan with removable bottom, neutralizes gluten elasticity. When the dough enters a hot oven without internal tension, it holds its razor-sharp fluted edges without slumping down the pan walls.
Essential blind baking tips make or break the shell. Dock the base thoroughly with a fork, line each mold with heatproof parchment paper or silicone film, and fill them to the rim with ceramic baking beads or uncooked dry rice. Bake at 175°C (350°F) for 14 minutes, carefully strip the weights, and return the bare shells to the oven for an additional 6 to 8 minutes until the interior turns a light, uniform golden amber. The dough must be completely baked through; underbaked crusts will collapse under custard within hours.
The Velvet Standard: Crème Pâtissière and Chilled Custard Stability
A flawless crust requires a stable partner. Traditional crème pâtissière pastry cream relies on cornstarch, egg yolks, whole milk, sugar, and high-fat European-style butter. The secret to achieving rich flavor without a heavy or gluey texture lies in cooking the starch past its gelatinization point.
Once the milk and yolk slurry boils, it must maintain a rolling bubble for a full 60 to 90 seconds while whisked vigorously. This brief boil deactivates alpha-amylase, an enzyme present in egg yolks that can slowly break down starch molecules and turn a firm cream soupy over time. Once cooked, whisk in cold cubed butter off the heat to create a glossy emulsion, then press plastic wrap directly against the surface to halt skin formation.
Achieving ideal chilled custard stability requires at least 3 hours of refrigeration at 4°C (39°F). Before assembling the tarts, scrape the set custard into a clean bowl and beat it vigorously with a silicone spatula or hand whisk. This step breaks the rigid starch matrix just enough to restore a silky, pipeable texture while preserving its capacity to support the weight of fruit slices.
Preventing Soggy Tart Crust: Barrier Techniques Compared
A common pitfall with fresh fruit tarts is moisture migration. Water from the custard inevitably tries to seep into the dry, porous crust. Professional bakeries prevent this soggy transformation by creating a hydrophobic barrier on the interior of the baked shell before adding any moisture-rich filling.
Home bakers can choose from three established methods depending on the desired flavor profile and shelf-life requirements:
| Barrier Method | Application Technique | Crisp Window | Best Flavor Pairing |
|---|---|---|---|
| Egg Wash Cauterization | Brush par-baked shell with egg yolk and heavy cream; bake 3 minutes at 160°C. | 8, 12 hours | Light vanilla, lemon curd, delicate fruit |
| Baked Almond Cream Filling | Pipe frangipane into par-baked shell; bake together until golden and set. | 18, 24 hours | Stone fruits, figs, dark berries |
| White Chocolate / Cocoa Butter | Paint warm melted barrier thinly on fully cooled shell; set in fridge 5 minutes. | 24, 36 hours | Strawberries, raspberries, tropical fruit |
For an authentic bistro profile, many chefs favor a hybrid interior: an almond cream filling baked directly into the base of the tart, chilled, and then topped with a thinner layer of smooth custard. This frangipane layer absorbs stray juices from both sides without losing its tender crumb.

Architectural Assembly: Seasonal Fresh Fruit and Pastry Piping Technique
Visual presentation is where amateur baking separates from boutique confectionery. Assembling a bite-sized party dessert requires working with clean geometric discipline. The foundation begins with deliberate pastry piping technique.
Fit a piping bag with a round 12 mm pastry tip. Position the nozzle directly in the center of the pre-sealed tart shell, held vertically at a 90-degree angle, about 5 mm above the base. Apply steady, uniform pressure, allowing the cream to expand outward in a concentric spiral until it sits flush with or slightly domed above the fluted crust rim. Avoid smoothing the surface flat with a knife; a slight crown in the center naturally elevates the fruit and produces a multidimensional profile.
For seasonal fresh fruit assembly, wash and dry your produce thoroughly at least an hour before slicing. Any excess surface moisture will dilute your glaze and cause fruit to slide off the pastry cream. When building a fresh strawberry topping, select firm, uniformly sized berries. Hull the stems flat, slice the strawberries lengthwise into 3 mm slivers, and arrange them in overlapping circular fans radiating from the perimeter inward, finishing with a small whole raspberry or curled strawberry point dead-center.
The Patisserie Finish: Apricot Nappage Glaze and Temperature Control
The hallmark shine of a Parisian boutique display comes from nappage, a clear or translucent pectin glaze. Without this coating, cut fruit rapidly dehydrates, shrivels at the edges, and loses its vibrant color within two hours of assembly.
A classic homemade glaze uses sieved apricot preserves thinned with 10% water by weight. Warm the mixture in a small saucepan over medium heat until it registers between 38°C and 42°C (100°F, 108°F). If the glaze is hotter than 45°C, it will melt the surface of the chilled pastry cream beneath the fruit. If it cools below 35°C, it turns thick and uneven, leaving messy clumps instead of a smooth mirror finish.
Using a soft-bristled pastry brush, dip into the warm apricot nappage glaze, tap off the excess, and gently dab, do not scrub, across every piece of exposed fruit. The glaze immediately locks in surface moisture, creates a reflective sheen under ambient lighting, and keeps the tart looking freshly assembled for up to 24 hours in cold storage.
Frequently Asked Questions (FAQ)
Q1: Can I make the pâte sablée shells ahead of time?
A1: Yes. Unfilled, fully baked tart shells can be stored in an airtight container with a food-grade silica gel pack at room temperature for up to 4 days. Alternatively, freeze unbaked dough shells in their tins for up to 1 month, baking directly from frozen with an extra 2 minutes of blind-baking time.
Q2: Why does my pastry cream look curdled or lumpy after chilling?
A2: Pastry cream sets firmly due to starch retrogradation in the refrigerator. It is not curdled. Simply beat the cold custard with a stiff whisk or paddle attachment for 30 to 45 seconds to shear the starch matrix back into a smooth, glossy emulsion before piping.
Q3: What fruit combinations hold up best for evening events?
A3: Firm, low-drip fruits such as whole raspberries, blueberries, blackberries, and firm kiwi slices hold up best. Avoid high-water fruits like melon, watermelon, or freshly cut citrus segments, which weep excessive juice that destabilizes the custard base regardless of the glaze used.
Setting the Standard for Small-Batch Tartlets
Crafting miniature fruit tarts with crisp shells and stable custard comes down to respecting pastry fundamentals: controlling moisture at every stage, properly gelatinizing starches, and handling fruit with minimal excess water. Once the base techniques of dough handling, temperature control, and barrier sealing are mastered, the format offers endless seasonal variety. Whether filled with simple strawberry fans or intricate stone-fruit rosettes, these bite-sized desserts deliver consistent texture and bakery-grade visual polish straight from the home oven.
